Lighting Control from Anywhere: How to Wire a 3-Way Switch with Ease
Ever wondered how to wire a three way switch so your hallway light can be controlled from both ends? Understanding 3-way switch wiring is key to efficient, user-friendly home lighting. In this guide, farashi electricwalks you through everything—from core wiring diagrams and code essentials to tips for smart upgrades—all delivered with clarity, confidence, and locally-aware insight. Read on and master your switch setup.
🛈Audio transcript & key points
Transcript
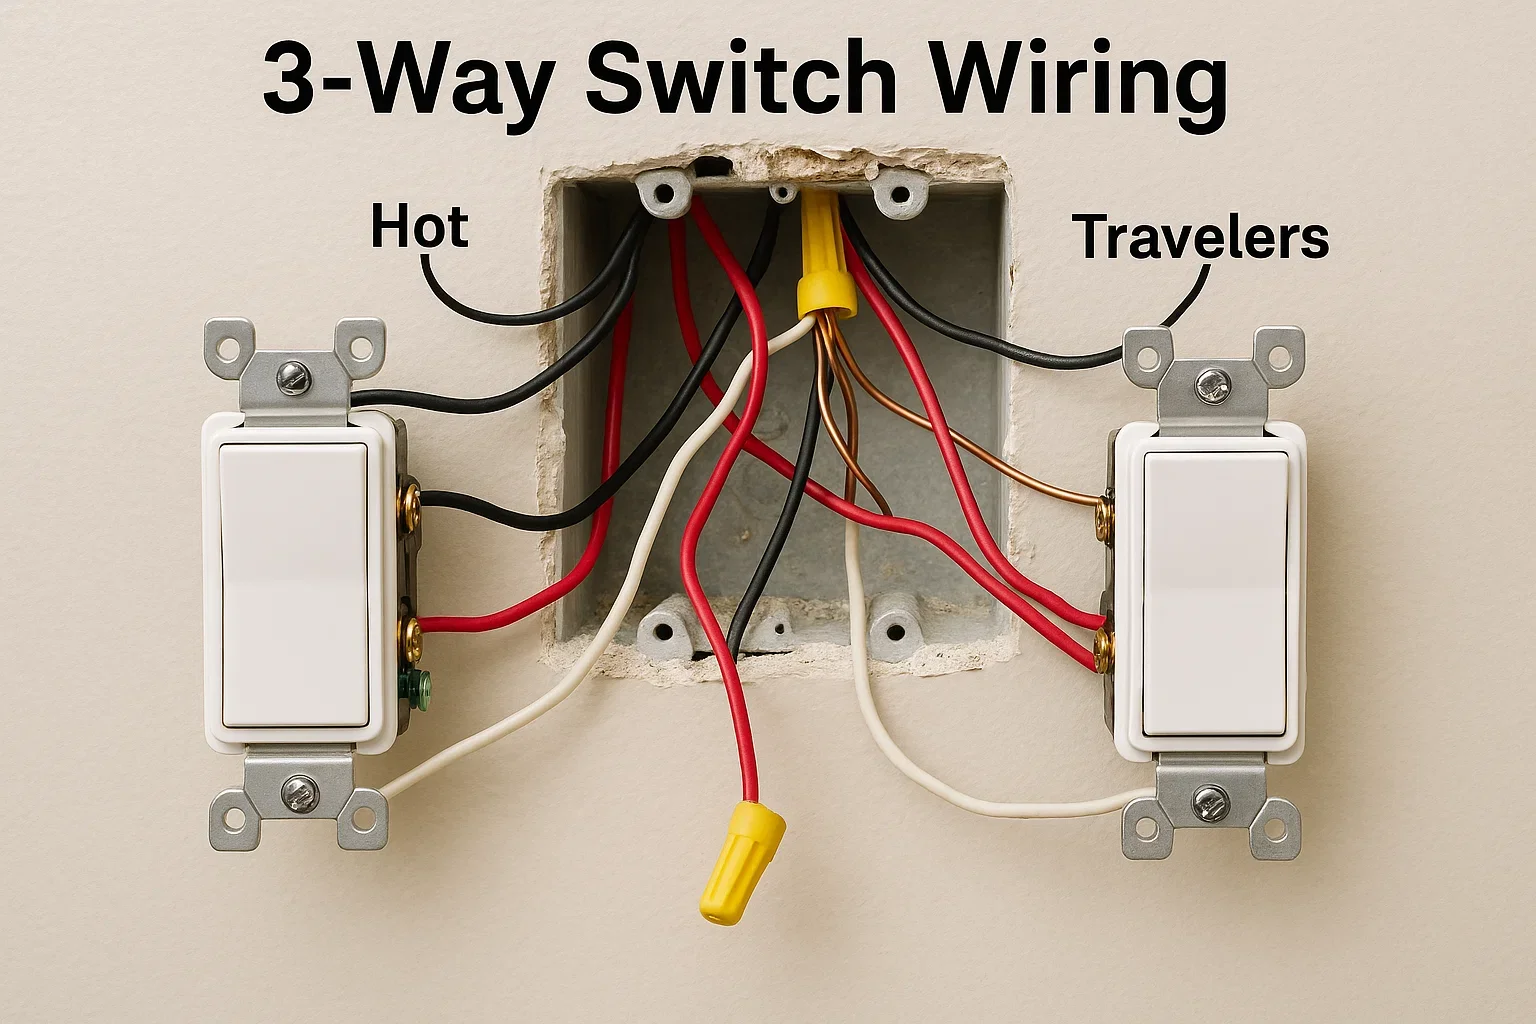
A 3-way switch setup lets you control one light from two different locations, like the top and bottom of a stairway
or each end of a hallway. Instead of a single switch and one “switch leg,” a 3-way circuit uses two 3-way switches and
a pair of traveler wires between them. Each switch has a “common” terminal, and the travelers connect the two switches
so the light can be turned on or off from either location. The challenge is correctly identifying line versus load and
making sure the common and traveler connections are not mixed up. Common mistakes include swapping the common and
traveler wires, misidentifying the feed, working on energized wiring, or leaving grounding incomplete. For safety, power
must be turned off and verified before any work, and if wire colors don’t match expectations or the box is crowded, it’s
best to have a licensed electrician handle it. For 3-way switch troubleshooting or installation in Los Angeles, call
Farashi Electric at (267) 248-5496.
Key Takeaways
3-way switches control one light from two locations using two switches and traveler wires.
The “common” terminal and traveler pair must be identified correctly; line vs load matters.
Common issues come from swapping common/travelers, misidentifying the feed, or unsafe work practices.
Always shut off power and verify it’s off; if unsure, hire a licensed electrician.
Call (267) 248-5496 for 3-way switch help in Los Angeles.
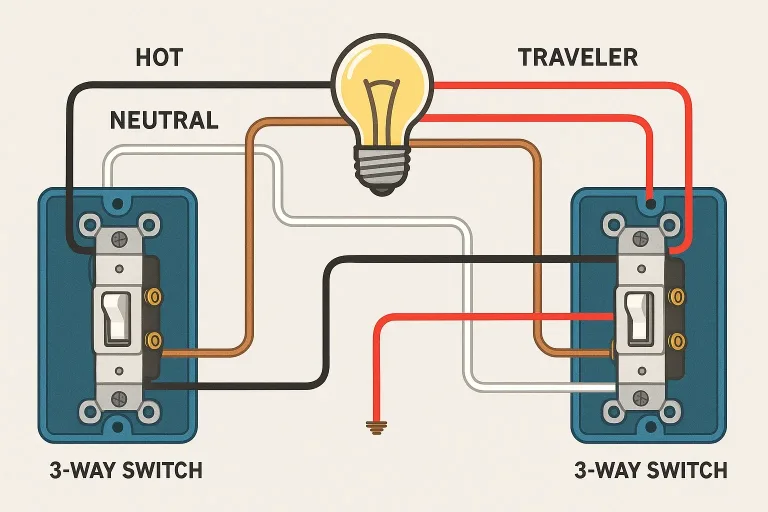
A 3-way switch lets you control a single light fixture from two different locations—perfect for stairways, hallways, or large rooms. Unlike a single-pole switch with two terminals, a 3-way includes three terminals (plus ground): one common (hot feed or load) and two travelers that carry current between switches.
This feature brings flexibility and convenience—especially helpful when you want lighting control from either end of a corridor.
Understanding the 3-Way Wiring Basics
In a typical setup:
Black (hot) connects to the common terminal on one switch.
Red & White become travelers between the two switches.
The neutral bypasses the switches and connects directly to the light fixture.
Ground wire ensures safety.
Travelers are interchangeable; however, the common terminal is critical and must be clearly identified.
Cut power, use insulated tools, wear safety gear. Color-code traveler wires with tape for clarity.
B. Identify Wires
Common wire (hot) to black screw; travelers to brass screws; ground to green. Neutral runs to light only.
C. Wiring the First Switch
Connect hot feed to common, attach travelers, and ground.
D. Wiring the Second Switch
Travelers connect to traveler terminals, common connects to fixture. Neutral is bypassed.
E. Final Check
Ensure all connections are tight, ground is continuous, and labeling is clear. Power on and test both switches.
New to this? Start with our basic light wiring guide to master the fundamentals before tackling a 3-way switch.
When planning a wiring 3 way switch installation, it’s also wise to assess the overall wiring health—especially if your home is aging—so consider electrical wiring and rewiring in Los Angeles to ensure both safety and long-term reliability. Our Northridge electrician team can diagnose multi-way switch issues and fix them fast.
Best Practice Insight
“Option A is the cleanest—simple, meets code, and puts a neutral in every switch box.” —Cabllc Reddit
User feedback underscores a key safety advantage: having neutral wire in each box supports future smart switch installations and reduces confusion down the line.